Prepare System
1. Create a local account that will be used for passenger config$ sudo useradd samdc $ sudo passwd samdc $ su - samdc2. Install RVM and Ruby using this post (How to Install RVM, Ruby and Rails), up to step 10.
Install Passenger
3. Start apache$ sudo apachectl start4. Install passenger
$ gem install passenger
$ passenger-install-apache2-module
This runs the installer...
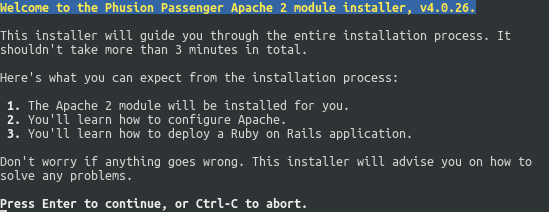

$ sudo yum install httpd-devel
$ sudo yum install apr-devel
$ sudo yum install apr-util-devel
$ passenger-install-apache2-module
A number of sources will be compiled and after that it will ask to update our Apache config...

$ apachectl -V | grep HTTPD_ROOT
 -D HTTPD_ROOT="/etc/httpd"
$ apachectl -V | grep SERVER_CONFIG_FILE
 -D SERVER_CONFIG_FILE="conf/httpd.conf"
From that, our config file is in /etc/httpd/conf/httpd.conf
7. Our Apache config has this at the end.
$ cat /etc/httpd/conf/httpd.conf
...
IncludeOptional conf.d/\*.conf
Which means we can maintain our extensions separately. In our case, what we want to do is to create a file called passenger.conf, then we can add the lines as indicated by the passenger installer from step 5 of this guide.
$ sudo vi /etc/httpd/conf.d/passenger.conf
$ cat /etc/httpd/conf.d/passenger.conf
LoadModule passenger_module /home/samdc/.rvm/gems/ruby-2.0.0-p353/gems/passenger-4.0.26/buildout/apache2/mod_passenger.so
PassengerRoot /home/samdc/.rvm/gems/ruby-2.0.0-p353/gems/passenger-4.0.26
PassengerDefaultRuby /home/samdc/.rvm/wrappers/ruby-2.0.0-p353/ruby
Configure Apache
8. Create directories that we will use later$ sudo mkdir /etc/httpd/sites-available $ sudo mkdir /etc/httpd/sites-enabled9. Add a virtual host for our rails app
$ sudo vi /etc/httpd/sites-available/depot.conf
<VirtualHost *:80>
   ServerName www.depot.com
   ServerAlias depot.com
   DocumentRoot /home/samdc/prod/depot/public
   <Directory /home/samdc/prod/depot/public>
      AllowOverride all
      Options all
      Require all granted
   </Directory>
</VirtualHost>
10. Tell Apache about our virtual hosts
$ vi /etc/httpd/conf/httpd.confAdd this at the bottom:
Include sites-enabled/*.conf11. Link the virtual host definition to sites-enabled
$ sudo ln -s /etc/httpd/sites-available/depot.conf /etc/httpd/sites-enabled/depot.conf12. Add ServerName entry to /etc/hosts file
$ vi /etc/hosts
127.0.0.1 www.depot.com
127.0.0.1 depot.com
Configure SELinux
13. Suspend SELinux$ sudo setenforce 014. Install checkpolicy
$ sudo yum install checkpolicy15. Walk through SELinux log and generate new SELinux policy module
$ sudo grep httpd /var/log/audit/audit.log | /usr/bin/audit2allow -M passenger16. Make policy active
$ sudo semodule -i passenger.pp17. Switch SELinux back to enforcing mode
$ sudo setenforce 118. Restart Apache
$ sudo apachectl restart
Deploy Rails App
19. Copy all files to the deploy directory$ cp -r /home/samdc/dev/depot/ /home/samdc/prod/20. Install all gems required
$ cd /home/samdc/prod/depot/If using a different db in production, e.g., mysql, change the Gemfile to add that for production
$ vi Gemfile
group :production do
  gem 'mysql2'
end
$ bundle install21. Create the database
$ mysql -u root -p
> CREATE DATABASE depot_production DEFAULT CHARACTER SET utf8;
> GRANT ALL PRIVILEGES ON depot_production.* TO 'username'@'localhost' IDENTIFIED BY 'password';
> EXIT;
22. Configure rails production yml file
$ vi config/database.yml
production:
  adapter: mysql2
  encoding: utf8
  reconnect: false
  database: depot_production
  pool: 5
  username: username
  password: password
  host: localhost
23. Lets load the database
$ rake db:setup RAILS_ENV="production"
$ rake db:seed
24. Change production environment settings
$ vi config/environments/production.rb
config.serve_static_assets = true
config.assets.compile = true
25. Precompile assets
$ rake assets:precompile26. Now browse to http://depot.com
No comments:
Post a Comment